The ESP32 microcontroller is widely used in IoT projects and offers a flexible and powerful platform for development. Sometimes, people may need to erase the flash memory of their esp32 devices, such as removing existing firmware or preparing the device for new code.
When we are developing our project, we may store some data in the flash, such as when we use the NVS functionality to store information in the flash, but when we need to download new firmware to test this device as a new one, this previous information is not overwritten. So we need to erase the flash completely and then download the new firmware.
In this article, we will lead to erase ESP32 flash memory and provide step-by-step instructions. Here, we introduce a tool called esptool.
To erase the flash memory of an ESP32 device, there are currently three common methods available:
Esptool.py, a command line tool (suitable for MacOS and Linux systems).
Esptool-js, a web-based tool (suitable for MacOS, Linux and Windows systems).
Flash Download Tools, a GUI-based tool based on Esptool (suitable for Windows system).
Next, we will provide detailed instructions for these three tools. In this article, we will use the M5Stack Core2 as an example. The M5Stack Core2 is a popular ESP32-based controller that features a 2.0-inch integrated capacitive touch screen and a wide range of built-in functions.
Esptool.py
Introduction:
Esptool.py is a Python-based, open-source, platform-independent utility for communicating with the ROM boot loader in Espressif SoCs.
It can do a number of things, for example:
Read, write, erase, and verify binary data stored in flash.
Read chip features and other related data such as MAC address or flash chip ID.
Read and write the one-time-programmable efuses.
Prepare binary executable images ready for flashing.
Analyze, assemble, and merge binary images.
How to use Esptool.py to erase the Flash chip in M5Core2
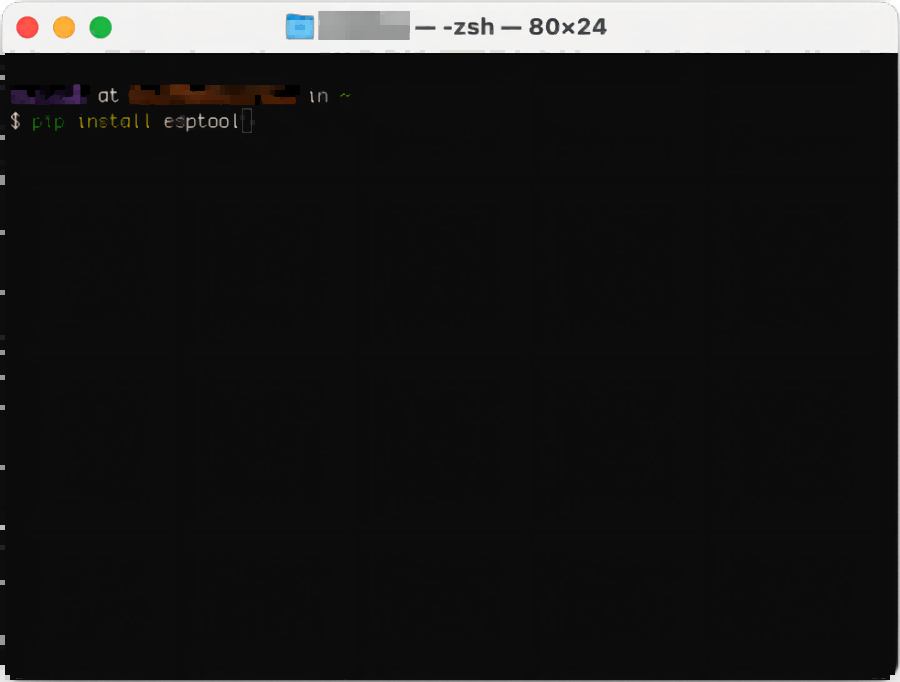
1). Install esptool.
Open the Terminal application and type the following installation command at the command line.
pipinstall esptool
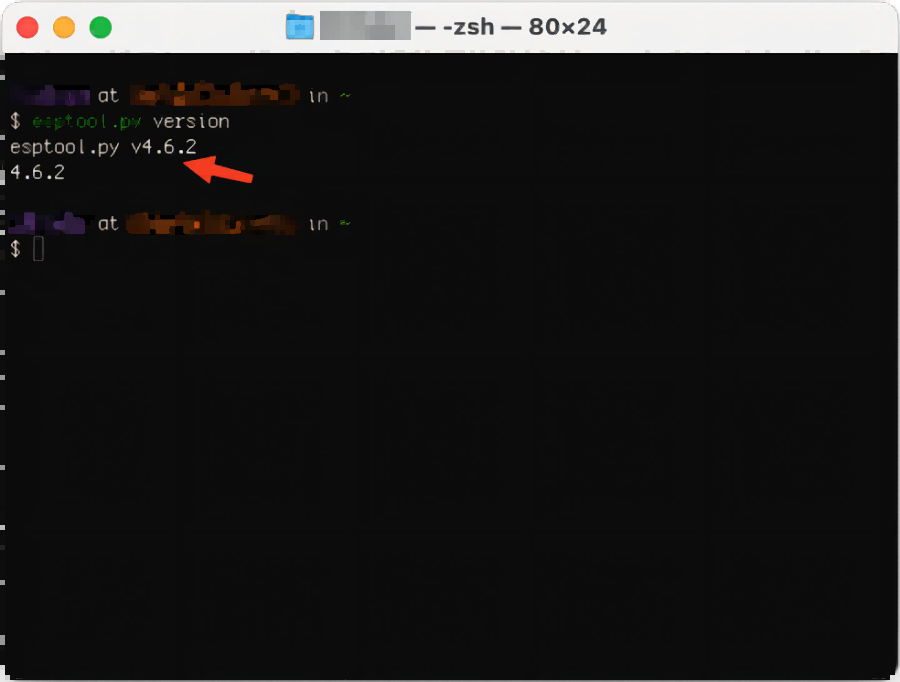
After the installation, we can test it with the following command. If it returns the correct version, it indicates a successful installation.
esptool version
2). Get the PORT number of M5Core2.
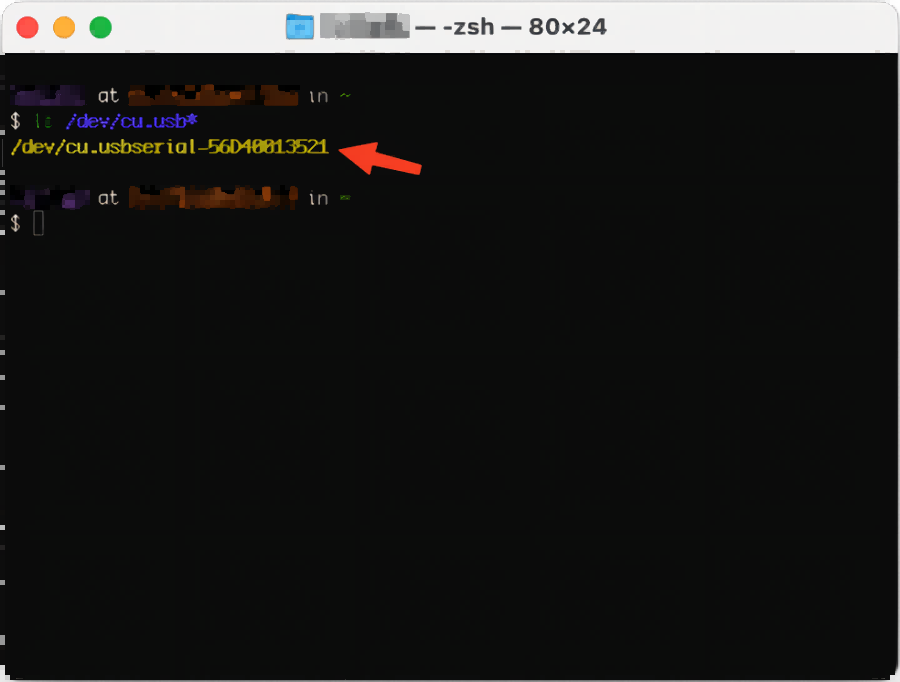
Use the following command to find out the USB serial port number of the M5Core2. In this step, please ensure that M5Core2 is the only device connected to your computer.
ls /dev/cu.usb*
*The serial port number in the image above is for the MacOS system. If your computer is running a different operating system, you will need to replace the serial port number with the appropriate one.
3). Execute the erase command to erase the Flash chip in M5Core2.
The Chip Auto automatically detects the chip type, making it easy to use. When you see the message "Chip erase completed successfully" in the terminal, it indicates a successful erase. The time required for erasing may vary depending on the actual capacity of the flash chip, so please be patient and wait a while. And now we have successfully erased the flash chip in M5Core2.
Esptool-js
Introduction:
Esptool-js is a Javascript implementation of esptool, a serial flasher utility for Espressif chips. esptool-js is based on Web Serial API and works in Google Chrome and Microsoft Edge version 89 or later browsers.
Unlike the Python-based esptool, esptool-js doesn't implement generation of binary images out of ELF files.
In the following steps, we'll erase the ESP32 flash chip using a web-based demo provided by Espressif Systems..
How to use Esptool-js to erase the Flash chip of M5Core2
Select a lower baud rate and then click the Connect button.
Select the serial port number of M5Core2 in the pop-up window.
3). Erase
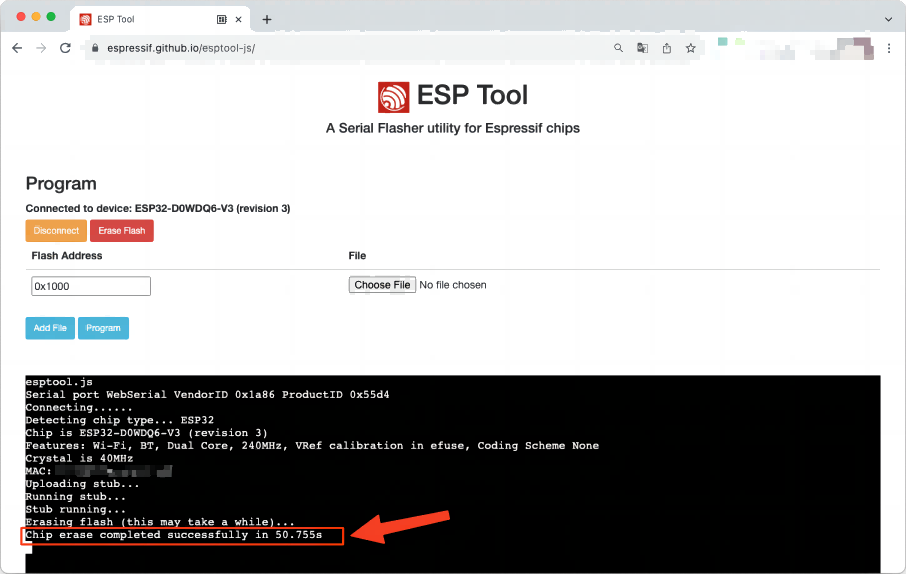
Once connected, the next page will show the correct model and version of the M5Core2's ESP32 chip.
Click the Erase Flash button to start erasing the Flash chip!
When "Chip erase completed successfully ..." is displayed, it means that the M5Core2 flash chip has been successfully erased. As mentioned earlier, the erasing process may take some time due to the different actual capacities of the flash chip. Please be patient and wait a while. In addition, this website is not limited to the erase function, but also allows you to burn firmware. You can explore this functionality separately, as it is beyond the scope of this discussion.
Now, we have successfully used Esptool-js to erase the Flash chip of M5Core2.
Next, we will present the final method.
Flash Download Tools
Introduction:
Flash Download Tools is a GUI tool designed for the Windows platform. This tool can be used to program not only ESP32 series chips but also chips such as ESP8266 and ESP8285. It also provides batch programming for mass production. In this article, we will only discuss how to erase the flash chip.
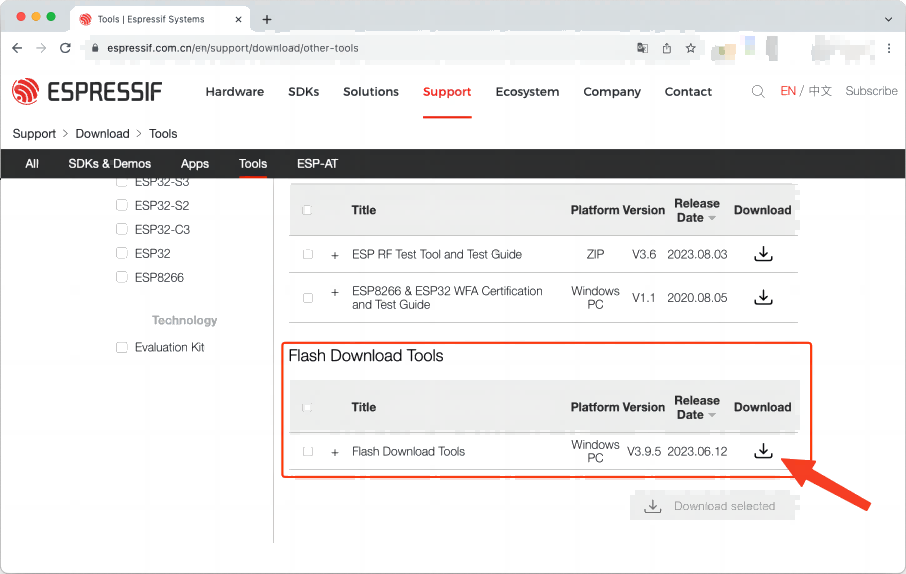
To get started, you will need to download the tool from the following link:Tools | Espressif Systems
How to use Flash Download Tools to erase the Flash chip of M5Core2
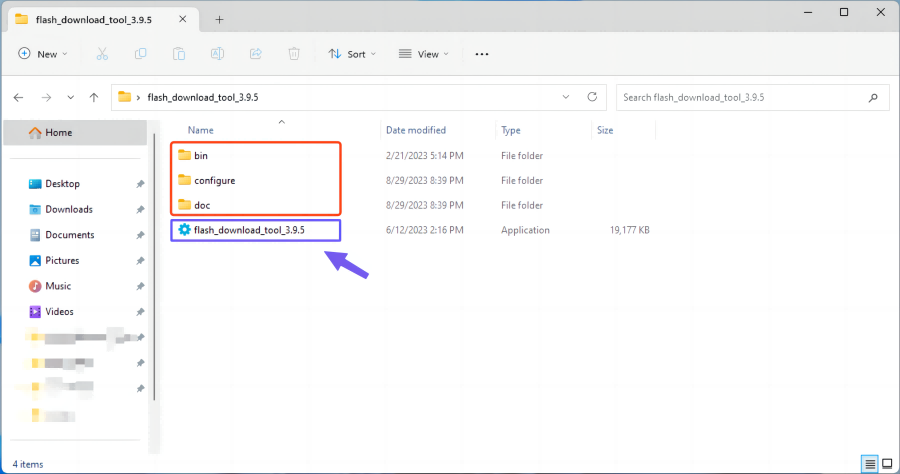
1). We need to extract the downloaded files.
Once the extraction is complete, we will see the list of files shown in the image below.
This tool does not need to be installed. You can simply double-click it to run it. The documentation can be found in the red box.
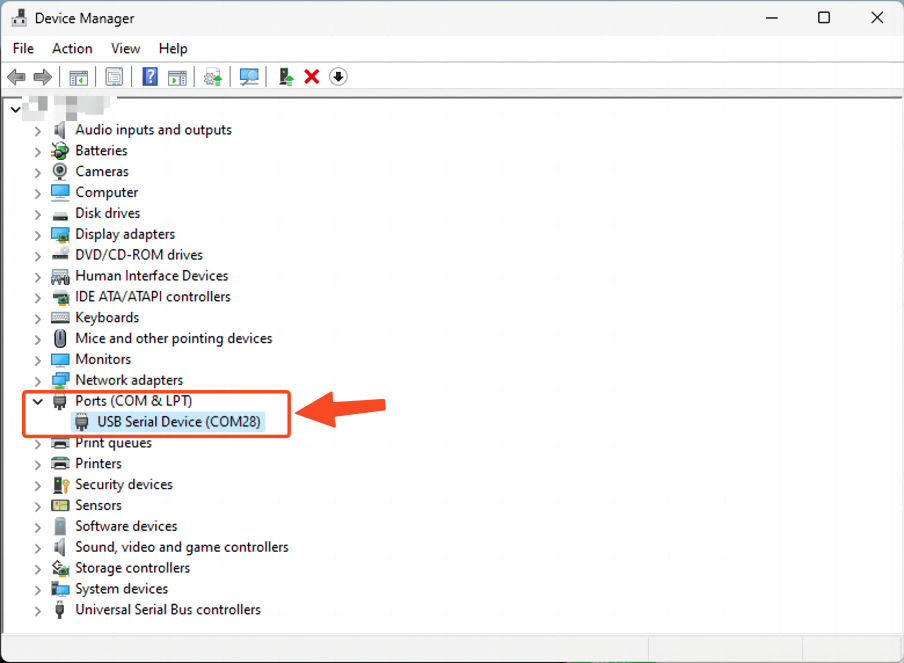
2). View the serial port number in Device Manager
Connect M5Core2 to your computer using a USB cable, and then open Device Manager.
The serial port number here is COM28, the numbers may vary for different devices. Please check the actual serial port number on your computer. If you have multiple devices connected, please disconnect the others and ensure that only one M5Core2 device is connected to the computer.
3). Open the tool and begin to erase!
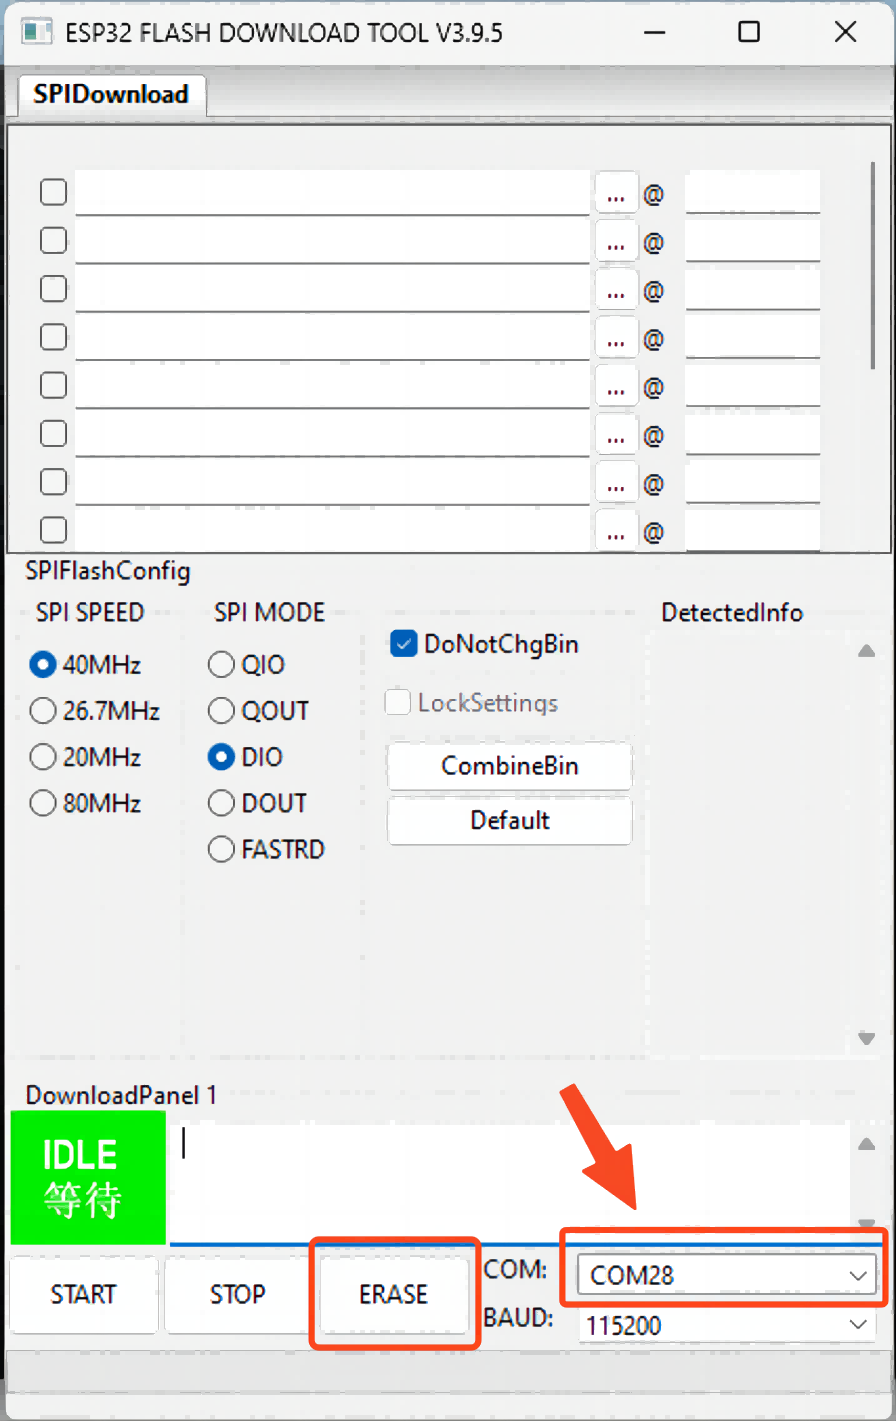
Here we select "ESP32" for ChipType. If you are using a device with a different chip model, select the specific chip model accordingly. For WorkMode and LoadMode you can leave the default options. The tool interface will look like the image below.
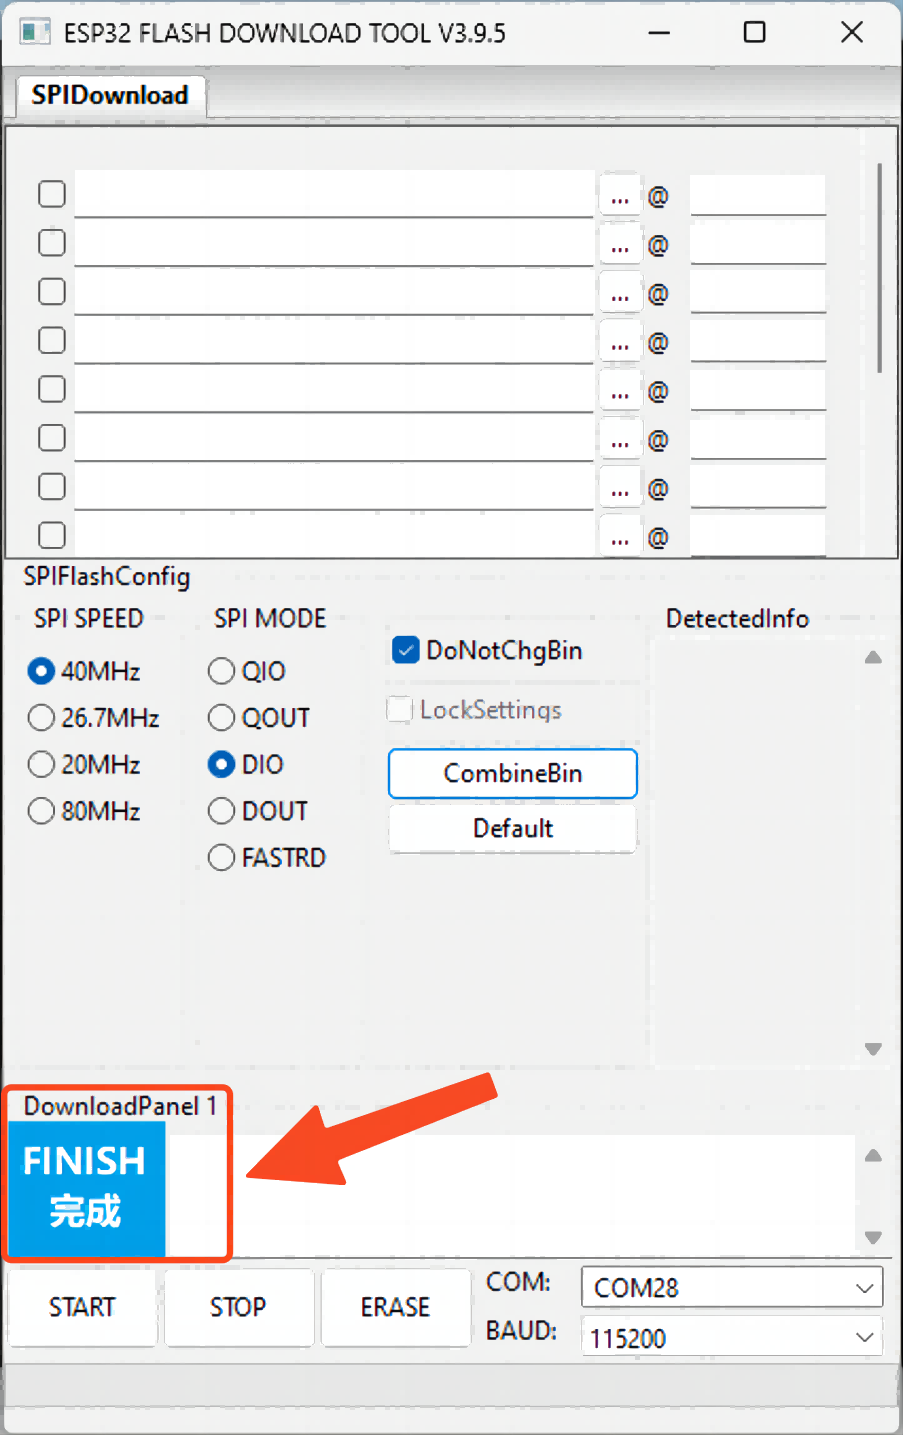
At the bottom right, select the serial port number we checked in step two from the COM drop-downmenu. If you have more than one device connected, make sure you do not select the wrong one to avoid accidentally erasing another device's flash or causing an error. Once you have made your selection, click the ERASE button to start the erasing process. Wait a while and when you see "FINISH" it means that the flash chip has been successfully erased.
Congratulations! You have successfully used Flash Download Tools to erase the Flash chip in M5Core2.
Summary:
In this tutorial, usingM5Core2as an example, we have presented three methods for erasing the ESP32 flash chip. Each method can be used and you can choose the one that suits you best.


 After the installation, we can test it with the following command. If it returns the correct version, it indicates a successful installation.